


How to Set Up Home Theater for Movies, Sports & Gaming
Watching films, football, or gaming at home is fun, but a proper home theatre setup takes it up a notch. Bigger screens, sharper images, and immersive sound can make your lounge feel like a cinema.
If you’re wondering how to set up home theater properly, this guide will take you step by step. From choosing the right room to picking a projector or TV, setting up speakers, and fine-tuning your space, you’ll be ready for movie nights, game sessions, or the 2026 FIFA World Cup.

Step 1. Choose the Room and Layout
The first step in setting up a home entertainment theater is picking the right room and planning its layout. The shape, size, and features of a space influence everything from screen size to sound quality and seating comfort.
Start with the room itself:
- Measure the space. Knowing the length, width, and ceiling height helps you decide how large a screen you can support and where to place seating, speakers, and equipment.
- Consider light control. Rooms with lots of windows or bright lamps are harder for projectors because ambient light reduces contrast and blacks. Blackout curtains or blinds make a big difference.
- Square rooms aren’t ideal. Rectangular spaces usually perform better acoustically, reducing echo and uneven bass.
Plan your layout before buying gear:
- Screen wall: Choose a wall free of doors or windows if possible. This gives you a solid surface for a projector screen or TV.
- Speaker positions: Map where speakers will go early. Front left, centre, right, and surround channels should be placed so they form a balanced sound field around listeners.
- Seating position: Try to place seats so everyone faces the screen head-on. A good rule of thumb is to sit about 1.2–2.5× the screen diagonal away for projectors and TVs alike.
Here’s a simple table illustrating the recommended seating distance based on screen size:
|
Screen Size (inches) |
Approx. Ideal Distance Range (metres) |
|
50” TV |
~1.5–2.0 m |
|
55” TV |
~1.7–2.2 m |
|
65” TV |
~2.0–2.6 m |
|
75” TV |
~2.3–3.0 m |
|
100” Projector Screen |
~3.3–4.5 m |
|
120” Projector Screen |
~4.0–5.5 m |
|
150” Projector Screen |
~5.0–7.1 m |
Taking time here means fewer surprises later when your screen arrives or you start running cables.
Step 2. Pick Your Display: Projector or TV?
A key decision when you’re figuring out how to set up a home theatre is choosing your main display. Both projectors and large TVs can give great results, but each comes with trade-offs.
TVs – bright and simple
Modern TVs (especially OLED and Mini-LED models) deliver excellent brightness, contrast, and HDR performance. They’re ideal for family spaces or rooms with some natural light because they stay clear and punchy even with lights on. They also require little technical setup — just plug in and watch.
Projectors – large and immersive
If you’re after a true cinema feel with a very large picture, projectors are hard to beat. They can produce images well over 100 inches, which feels more like a real theatre. This makes them perfect for movie nights, big sports events, or gaming marathons. The trade-off is that they work best in darker rooms and need a screen or smooth wall and careful placement.
Projector vs TV for a home theatre
|
Feature |
Projector |
TV |
|
Screen Size |
Typically 80–150+ inches |
Usually 55–85 inches |
|
Bright Room Performance |
Best in dimmer rooms |
Excellent |
|
Space Required |
Needs projection distance and screen space |
More compact setup |
|
Sports & Watch Parties |
Great for large groups |
Better for smaller groups |
|
Movie Nights |
Highly immersive |
Very good image quality |
|
Gaming |
Great on larger screens |
Typically lower input lag |
|
Setup Complexity |
Moderate |
Simple |
Room and use matter:
- Small, multi-use spaces: TV might be the better choice.
- Dedicated cinema rooms or large spaces: A projector often delivers bigger “wow” factor.
- Hybrid rooms: Some people combine both — a hidden projector and a TV for daytime viewing.
Either way, think about how you’ll use your system most often — films, sports, gaming, or a bit of everything — and let that guide your display choice.
Best Projectors for Your Home Theater
If you’ve decided a projector is the right fit for your home theatre, the next step is choosing a model that matches your room, viewing habits, and budget.
For those wondering, “What’s a good projector for home theater?” below are three top-rated soundcore Nebula projectors for different types of setups:
soundcore Nebula Cosmos 4K SE
The soundcore Nebula Cosmos 4K SE is a strong all-round choice for most home theatres. Its 4K Dolby Vision picture delivers sharp details, vibrant colours, and impressive contrast, helping films, sports, and games look more immersive on a large screen.
One of its biggest advantages is ease of setup. Thanks to IEA 4.0, the projector can automatically handle autofocus, keystone correction, screen fit, obstacle avoidance, wall-colour adaptation, and ambient light adaptation. This makes it particularly appealing for living rooms and multi-purpose spaces where the projector may not always stay in the same position.
With 1,800 ANSI lumens, Google TV, built-in Netflix, and HDMI 2.1 connectivity, it works equally well as a dedicated home movie theatre projector and an everyday entertainment hub.

Best for: Most households looking for a versatile 4K home theater projector that balances picture quality, convenience, and value.
|
Key Specifications |
Nebula Cosmos 4K SE |
|
Resolution |
4K UHD |
|
Brightness |
1,800 ANSI Lumens |
|
HDR |
Dolby Vision |
|
Smart Platform |
Google TV + Netflix |
|
Connectivity |
HDMI 2.1 |
|
Setup Features |
IEA 4.0 Auto Setup Suite |
soundcore Nebula Mars 3 Air
Not everyone has space for a dedicated cinema room. The soundcore Nebula Mars 3 Air is designed for viewers who want flexibility and portability without giving up a large-screen experience.
Its 1080p HDR picture and compact design make it easy to move between the living room, bedroom, conservatory, or the garden. Intelligent Environment Adaptation handles autofocus, screen fit, keystone correction, and obstacle avoidance automatically, helping you get set up in minutes.
The built-in battery provides up to 2.5 hours of video playback, making it suitable for movie nights where power outlets may not be conveniently located.

Best for: Small rooms, casual home cinema setups, bedrooms, and users who want a portable projector with built-in battery power for flexible everyday viewing.
|
Key Specifications |
soundcore Nebula Mars 3 Air |
|
Resolution |
1080p Full HD |
|
Brightness |
400 ANSI Lumens |
|
Battery Life |
Up to 2.5 Hours |
|
Audio |
Dual 8W Dolby Audio Speakers |
|
Smart Platform |
Google TV + Netflix |
soundcore Nebula X1 Pro
For viewers who want the closest thing to a private cinema, the soundcore Nebula X1 Pro sits at the top of the range.
Its 4K triple-laser projection system, 3,500 ANSI lumens, Dolby Vision support, and advanced contrast performance help bring out detail in everything from dark movie scenes to bright sports broadcasts. The projector is capable of producing a large, cinematic image while maintaining strong colour accuracy and clarity.
Where it really stands apart is audio. The wireless Dolby Atmos 7.1.4 system delivers up to 400W of sound, creating an immersive soundstage that can make action films, live concerts, and major sporting events feel much closer to a commercial cinema experience.
Built-in wheels, a telescopic handle, and FlexWave sound field adjustment add further convenience, making it easier to optimise the experience for different rooms and seating layouts.

Best for: Premium home theatre rooms, media spaces, and entertainment-focused homes that want a flagship 4K projector with a powerful wireless surround-sound system.
|
Key Specifications |
soundcore Nebula X1 Pro |
|
Resolution |
4K Triple-Laser |
|
Brightness |
3,500 ANSI Lumens |
|
HDR |
Dolby Vision |
|
Audio |
Dolby Atmos 7.1.4 |
|
Sound Output |
400W |
|
Audio Optimisation |
FlexWave Sound Field Adjustment |
Step 3. Decide on Your Audio System
Sound is just as important as the screen when setting up a home theatre. The right audio setup can make every explosion, goal, or musical score feel immersive.
Options for your home theatre audio:
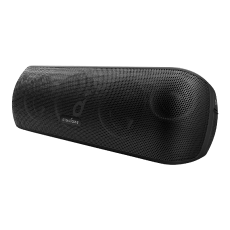
- Soundbars: Simple to set up and ideal for smaller rooms. Modern soundbars often support Dolby Atmos and virtual surround sound. They work well with TVs and some projectors.
- 5.1 or 7.1 Surround Systems: If you want a more cinematic experience, a full surround system places speakers around the room — front, centre, rear, and subwoofer. This creates a 3D soundstage, perfect for movies, sports, and games.
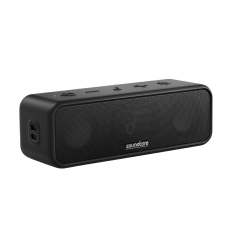
- Wireless/Bluetooth Speakers: Portable speakers can supplement a projector setup, especially for outdoor or multi-room use. Some models allow pairing multiple units for larger coverage.
Practical tips:
- Keep the centre speaker aligned with the screen for clear dialogue.
- Subwoofers can go almost anywhere, but a corner often gives better bass.
- For surround setups, place rear speakers slightly above ear height for optimal immersion.
Step 4. Set Up Source Devices
With many modern smart TVs and projectors, this step is often much simpler than it used to be.
Platforms such as Google TV, Netflix, Disney+, Prime Video, and YouTube are now built directly into many displays. If you’re using a smart TV or a smart projector like the Nebula range, you may be able to start streaming immediately after connecting to Wi-Fi.
That said, some home theatre setups still benefit from additional source devices depending on how you watch content.
Common source devices
- Streaming devices: Google TV, Apple TV, Fire TV Stick, or Roku give easy access to Netflix, Disney+, Sky Stream, and other platforms.
- Game consoles: PlayStation, Xbox, or Nintendo Switch double as both gaming and streaming devices. HDMI 2.1 ports allow high frame rates and 4K resolution.
- Blu-ray / DVD players: Useful if you have a physical media collection or want 4K UHD discs for movie nights.
- Media servers / NAS: Store your movie or music library locally and stream to your system without buffering.
Step 5. Install an AV Receiver
If you want surround sound, a richer audio experience, or multiple input sources working together, an AV receiver becomes the hub of your system.
It’s the central unit that connects your TV or projector to speakers, sound formats, gaming consoles, Blu-ray players, and more, and it decodes surround sound formats like Dolby Atmos or DTS:X.
Basic setup steps:
- Choose a ventilated location: Give your receiver space at the front of your media unit or on a shelf with good airflow.
- Connect your sources: Use HDMI cables to plug in your streaming device, Blu-ray player, or games console into the receiver’s HDMI inputs.
- Connect to your display: Run an HDMI output from the receiver to your TV or projector. This lets the receiver handle audio while passing video through to the screen.
- Hook up speakers: Connect your surround speakers and subwoofer using speaker wire or dedicated outputs on the receiver.
Pro tips:
- Label cables as you connect them; it makes future changes much easier.
- Use quality HDMI cables (preferably HDMI 2.1) to support high-resolution video and surround formats.
Step 6. Run Room Calibration
Once everything is connected, calibration is the final step to getting your sound right. Room acoustics — the way sound reflects off walls, floors, and furniture — can drastically affect clarity, bass response, and imaging. Calibration adjusts your system, so speakers work in harmony for your specific space.
Most modern AV receivers include built-in calibration tools (such as Audyssey, Dirac, or YPAO). These use a microphone you place at your main listening spot. The receiver plays test tones and measures how your speakers interact with the room. Then it automatically adjusts levels, delays, and equalisation for a balanced sound across your seats.
Conclusion
Setting up a home theatre is easier than it seems when you break it into clear steps. From choosing the right room and display to installing speakers, connecting devices, and calibrating your system, every choice impacts your viewing experience.
Learning how to set up home theater properly ensures movies, sports, and gaming feel immersive and enjoyable. With the right layout, screen, audio, and source setup, your space can become the ultimate entertainment hub for family and friends.
FAQs
What is needed for a home theater system?
A home theater system usually needs a display, a sound system, and devices that play your content, such as streaming boxes or game consoles. The display can be a TV or a projector, depending on your room and preference. Good audio is just as important as the picture because it creates depth and immersion. You also need proper cables, seating, and a suitable room layout. When all these elements work together, the experience feels more like a cinema.
What are some common home theater mistakes?
One common mistake is focusing only on-screen quality while ignoring sound, which leads to a flat and unbalanced experience. Another issue is placing the screen or speakers without considering room layout, causing poor viewing angles or weak audio. Many people also overlook lighting, which can reduce picture clarity, especially with projectors. Incorrect seating distance is another problem that affects comfort. A well-planned setup avoids these issues and creates a smoother, more enjoyable viewing experience.
What is the best size room for a home theater?
There’s no single “perfect” size, but most experts recommend a rectangular space that’s at least around 12 × 16 feet for a comfortable dedicated home theater. This gives room for a large screen (around 100–120 inches), proper surround-sound speaker placement, and enough viewing distance without feeling cramped. Larger rooms (15 × 20 ft or more) work well for bigger screens and extra seating, while anything smaller may limit screen size and seating comfort.


