


Backyard Projector Setup Guide: How to Build an Outdoor Movie Theater at Home
There is a unique magic to watching a film under the stars, surrounded by the comfort of your own home. Creating a dedicated outdoor movie theater is a project that promises endless nights of entertainment, bringing friends and family together for shared cinematic experiences. While the concept may seem complex, a successful backyard projector setup is entirely achievable with careful planning and the right equipment. This guide will walk you through every critical step, from initial planning and gear selection to fine-tuning the perfect audiovisual experience, ensuring your outdoor cinema rivals the comfort and immersion of an indoor theater.
Planning Your Outdoor Cinema Space
Before purchasing any equipment, the first step is to assess and prepare your space. The location will dictate many of your subsequent choices.
Choosing the Location: Select a flat area with enough space for your desired screen size and seating. Consider the distance from power sources and the path of ambient light. A spot against a fence, wall, or between two trees can serve as a natural anchor for your screen.
Managing Ambient Light: For the best image quality, darkness is key. Schedule movie nights after sunset. Be mindful of streetlights, porch lights, or bright windows, and plan to mitigate them with strategic positioning or temporary shading.
Seating and Comfort: Create a comfortable viewing area. Options range from weather-resistant patio furniture and picnic blankets to dedicated outdoor bean bags and loungers. Don't forget side tables for snacks and drinks.
The Core Components of Your Setup
A great outdoor theater rests on three pillars: the projection surface, the projector itself, and the audio system.
Selecting the Perfect Screen
The screen is your canvas. Your main options are:
Inflatable Screens: Portable and easy to set up, these are great for occasional use. They require an air pump and staking to secure against wind.
Fixed-Frame Screens: These provide a taut, professional-grade surface for the sharpest image. They are more permanent and require a sturdy structure or wall for mounting.
DIY Options: A smooth, light-colored wall or a tightly stretched white sheet can work surprisingly well for a budget-friendly start. Ensure the surface is as flat and wrinkle-free as possible.
Choosing the Right Projector
This is the heart of your backyard projector setup. Key specifications to consider include:
Brightness (Lumens): For outdoor use, you need significant brightness to combat residual ambient light. Look for a minimum of 2,000 ANSI lumens, with 3,000+ being ideal for larger screens or less-than-perfect darkness.
Resolution: 1080p (Full HD) is a good standard, but 4K projection is becoming the new benchmark for stunning detail, especially on screens over 100 inches.
Throw Distance: Calculate the distance needed between the projector and the screen to achieve your desired image size. Use online "throw distance calculators" provided by projector manufacturers.
Connectivity: Ensure the projector has the necessary ports (HDMI, USB) to connect to your media sources, such as streaming sticks, Blu-ray players, or gaming consoles.
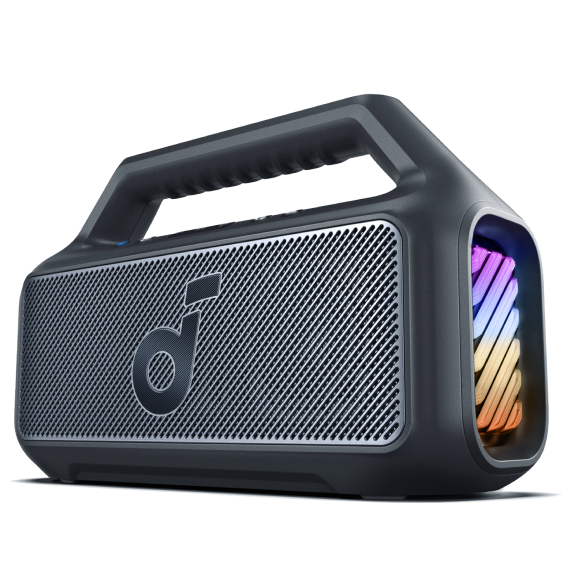
For those seeking a premium, all-in-one solution that excels in outdoor environments, the soundcore Nebula X1 Pro 4K Projector represents a significant leap forward. It combines a powerful 4K triple-laser projector with a detachable, high-fidelity audio system in one portable unit.
Insert product recommendation
The Nebula X1 Pro is engineered as a complete mobile theater station. Its 4K laser engine delivers 3,500 ANSI lumens of exceptional brightness and supports Dolby Vision for breathtaking HDR content. What truly sets it apart is its integrated 7.1.4 channel Dolby Atmos sound system. The front soundbars are detachable and wireless, and they pair with wireless rear satellites and powerful subwoofers, creating a genuinely immersive surround sound experience that is perfectly synced. Features like FlexWave™ smart audio calibration automatically optimize sound for your specific space, while its IP43 rating and long battery life make it resilient and convenient for outdoor use. Its built-in Google TV provides seamless access to all major streaming services.

Audio: Beyond the Built-in Speakers
Projector speakers are rarely sufficient for an immersive outdoor experience. Sound disperses quickly in open air.
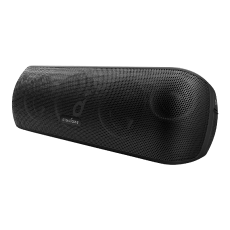
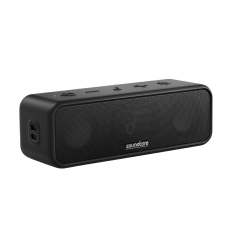
Dedicated Sound Systems: A quality Bluetooth speaker or a pair of bookshelf speakers placed near the seating area will provide a substantial upgrade. For true cinematic impact, consider a soundbar or a multi-channel system.
Wireless Solutions: To avoid tripping hazards from cables running across your patio, prioritize wireless speakers or systems that connect via Bluetooth or Wi-Fi. Wi-Fi generally offers better synchronization and less audio lag (latency) than standard Bluetooth.
All-in-One Audiovisual Solutions: Some modern projectors are designed with audio as a core priority. For instance, the soundcore Nebula X1 bundle includes a 4K triple-laser projector paired with two wireless Wi-Fi speakers that create a 4.1.2 channel lossless surround sound setup with remarkably low latency. This eliminates the guesswork of matching separate audio and video components.
Insert product recommendation
The Nebula X1 features smart AI spatial adaptation that automatically scans and adjusts the image for the best possible fit and focuses on your screen or wall.

Step-by-Step Setup and Calibration
With your components selected, follow this process for installation.
Secure the Screen: Assemble and position your screen, ensuring it is taut and stable. The bottom should be at a comfortable viewing height.
Position the Projector: Place the projector on a stable, level surface (a sturdy table or stand) at the correct throw distance. Use the projector's zoom and lens shift features (if available) to fit the image to the screen.
Connect Sources: Hook up your media player (Amazon Fire Stick, Roku, laptop, etc.) to the projector using an HDMI cable. For wireless projection, use built-in smart TV platforms like Google TV or screen mirroring functions.
Fine-Tune the Image: Access the projector's menu to adjust focus, keystone correction (to square the image if the projector isn't perfectly aligned), and picture modes. An "Outdoor" or "Bright" mode can enhance visibility.
Set Up Audio: Connect your external speaker system to the projector's audio output (3.5mm jack, optical, or HDMI ARC) or pair via Bluetooth. Perform a sound test with movie content to ensure dialogue is clear and effects are impactful. Position speakers at ear level for the best experience.
Optimizing the Experience
Combatting Wind and Weather: Have weights or stakes ready for inflatable screens and lightweight equipment. Always check the weather forecast and have a contingency plan to move indoors quickly if needed. Use equipment with weather resistance ratings where possible.
Creature Comforts: Provide blankets for cooler evenings, citronella candles or bug repellents, and easy access to refreshments. Outdoor-rated string lights set to a dim level can provide ambient light for safety without ruining the picture.
Content Curation: Create playlists or have a lineup of movies ready. Consider your audience—family-friendly animations, classic blockbusters, or cult favorites often work well for group settings.
Product Recommendations for a Flawless Setup
Investing in the right technology transforms a good setup into a great one. For viewers who demand the utmost in picture quality, exploring the latest 4K Projectors is essential. These devices offer four times the resolution of Full HD, revealing incredible detail that makes large outdoor screens truly spectacular.
When selecting a projector, consider models from established lines known for performance and reliability. You can discover a range of options designed for high-impact viewing in the soundcore Nebula Projector collection, which includes various models tailored for different needs and environments.
Conclusion
Building an outdoor movie theater is a rewarding project that extends your living and entertainment space. A successful backyard projector setup hinges on thoughtful planning regarding location, a conscious selection of a bright projector and suitable screen, and a dedicated audio solution to fill the space with clear, powerful sound. By following this guide and considering integrated solutions like the soundcore Nebula series, you can eliminate technical hurdles and focus on what truly matters: creating unforgettable memories with every movie night under the stars. Your perfect cinematic escape is waiting just beyond your back door.
If you’re ready to bring your outdoor cinema to life, the upcoming Spring Sale is the perfect opportunity to upgrade. The Warm-Up runs from March 3–9, followed by the Official Sale from March 10–16. During this event, you can enjoy mystery box gifts with qualifying purchases, buy-and-get deals, member-exclusive discounts, and limited-time flash sales. Explore all current promotions on the best-deals page.
Frequently Asked Questions (FAQ)
What is the minimum budget I need for a decent backyard projector setup?
You can start a basic but functional setup for a few hundred dollars. This would typically include a 1080p projector with around 3,000 lumens, a simple pull-down or inflatable screen, and a paired Bluetooth speaker. For a more premium experience with 4K resolution, high brightness, and integrated high-quality audio, budgets can range from 3,000 or more for all-in-one cinematic systems.
How do I manage power for all my outdoor electronics?
Safety is paramount. Use a heavy-duty, outdoor-rated extension cord with a Ground Fault Circuit Interrupter (GFCI) plug to power your projector and any plugged-in audio equipment from a protected indoor outlet. For ultimate flexibility and to reduce cable clutter, seek out projectors and speakers with substantial built-in battery life, allowing for several hours of cord-free operation.
My image looks blurry or distorted at the edges. How can I fix this?
This is usually a result of misalignment. First, ensure the projector is positioned directly perpendicular to the center of the screen. Then, use the projector's digital keystone correction feature (found in the settings menu) to adjust the image shape until it is a perfect rectangle. For the sharpest results, physically aligning the projector correctly is always preferable to excessive digital correction, which can slightly reduce image quality.


